
FLY TYING: HOW TO TIE SCULPZILLA
Asheville Fly Fishing Company
Sculpzilla is a popular pattern that imitates one of the brown trout’s favorite baitfish, the sculpin. On the South Holston River and Watauga River, it is a streamer pattern that often finds its way into our rotation when targeting predatory fish.

Sculpins are stubby baitfish with rounded heads, wide pectoral fins and a tapered body. Coloration varies depending on watershed and species, but most are shades of brown, black, olive and tan with darker mottling and light bellies. The wide pectoral fins help them hold to the of the bottom river but they are often swept away by quicker currents. In their search for food, they clumsily dart and pause along the riverbed often grabbing the attention of large, predatory trout looking for an easy meal.
This pattern can be fished in a variety of ways. On larger rivers like the east Tennessee Tailwaters we find it is very effective when fished from a drift boat casting along the banks and on the bottom near fast riffles. Try quartering casts downstream and waiting a few seconds for the fly to sink into the strike zone before stripping it back to the boat. During the retrieve, line mends, rod twitches and abrupt stops all work together to mimic their erratic swimming behavior.
Sculpzilla is a great “guide fly” as it closely imitates the natural while remaining a quick pattern to tie. The heavy cone head makes sure your fly quickly gets into the strike zone, the marabou and extra turn of rabbit strip build up the wide tapered profile while the guinea feather adds the look of bloody gill plates. This pattern can be tied in several colors but common variations are black, natural, olive and white. If you are unsure of which colorway to begin with, try matching the fly to the color of the substrate of your home river.
MATERIALS
Gamakatsu Octopus stinger hook #4
X-eyed cone size medium
1/8’’ Rabbit strip
Polar chenille
Guinea feather
Marabou
35 mm articulated fish shank
20 lb. Dacron or bite wire for articulation
MATERIAL PREPERATION
Cut a 6” length of rabbit strip
Slide X-Eyed Cone onto articulated shank
Cut a 6” length of articulation wire material

STEP 1
Insert the hook into the vise.

STEP 2
Start your thread behind the eye wrapping down to the midpoint on the hook shank.
STEP 3
Tie in a length of rabbit strip roughly twice the length of the shank. Secure with a few tight wraps.
STEP 4
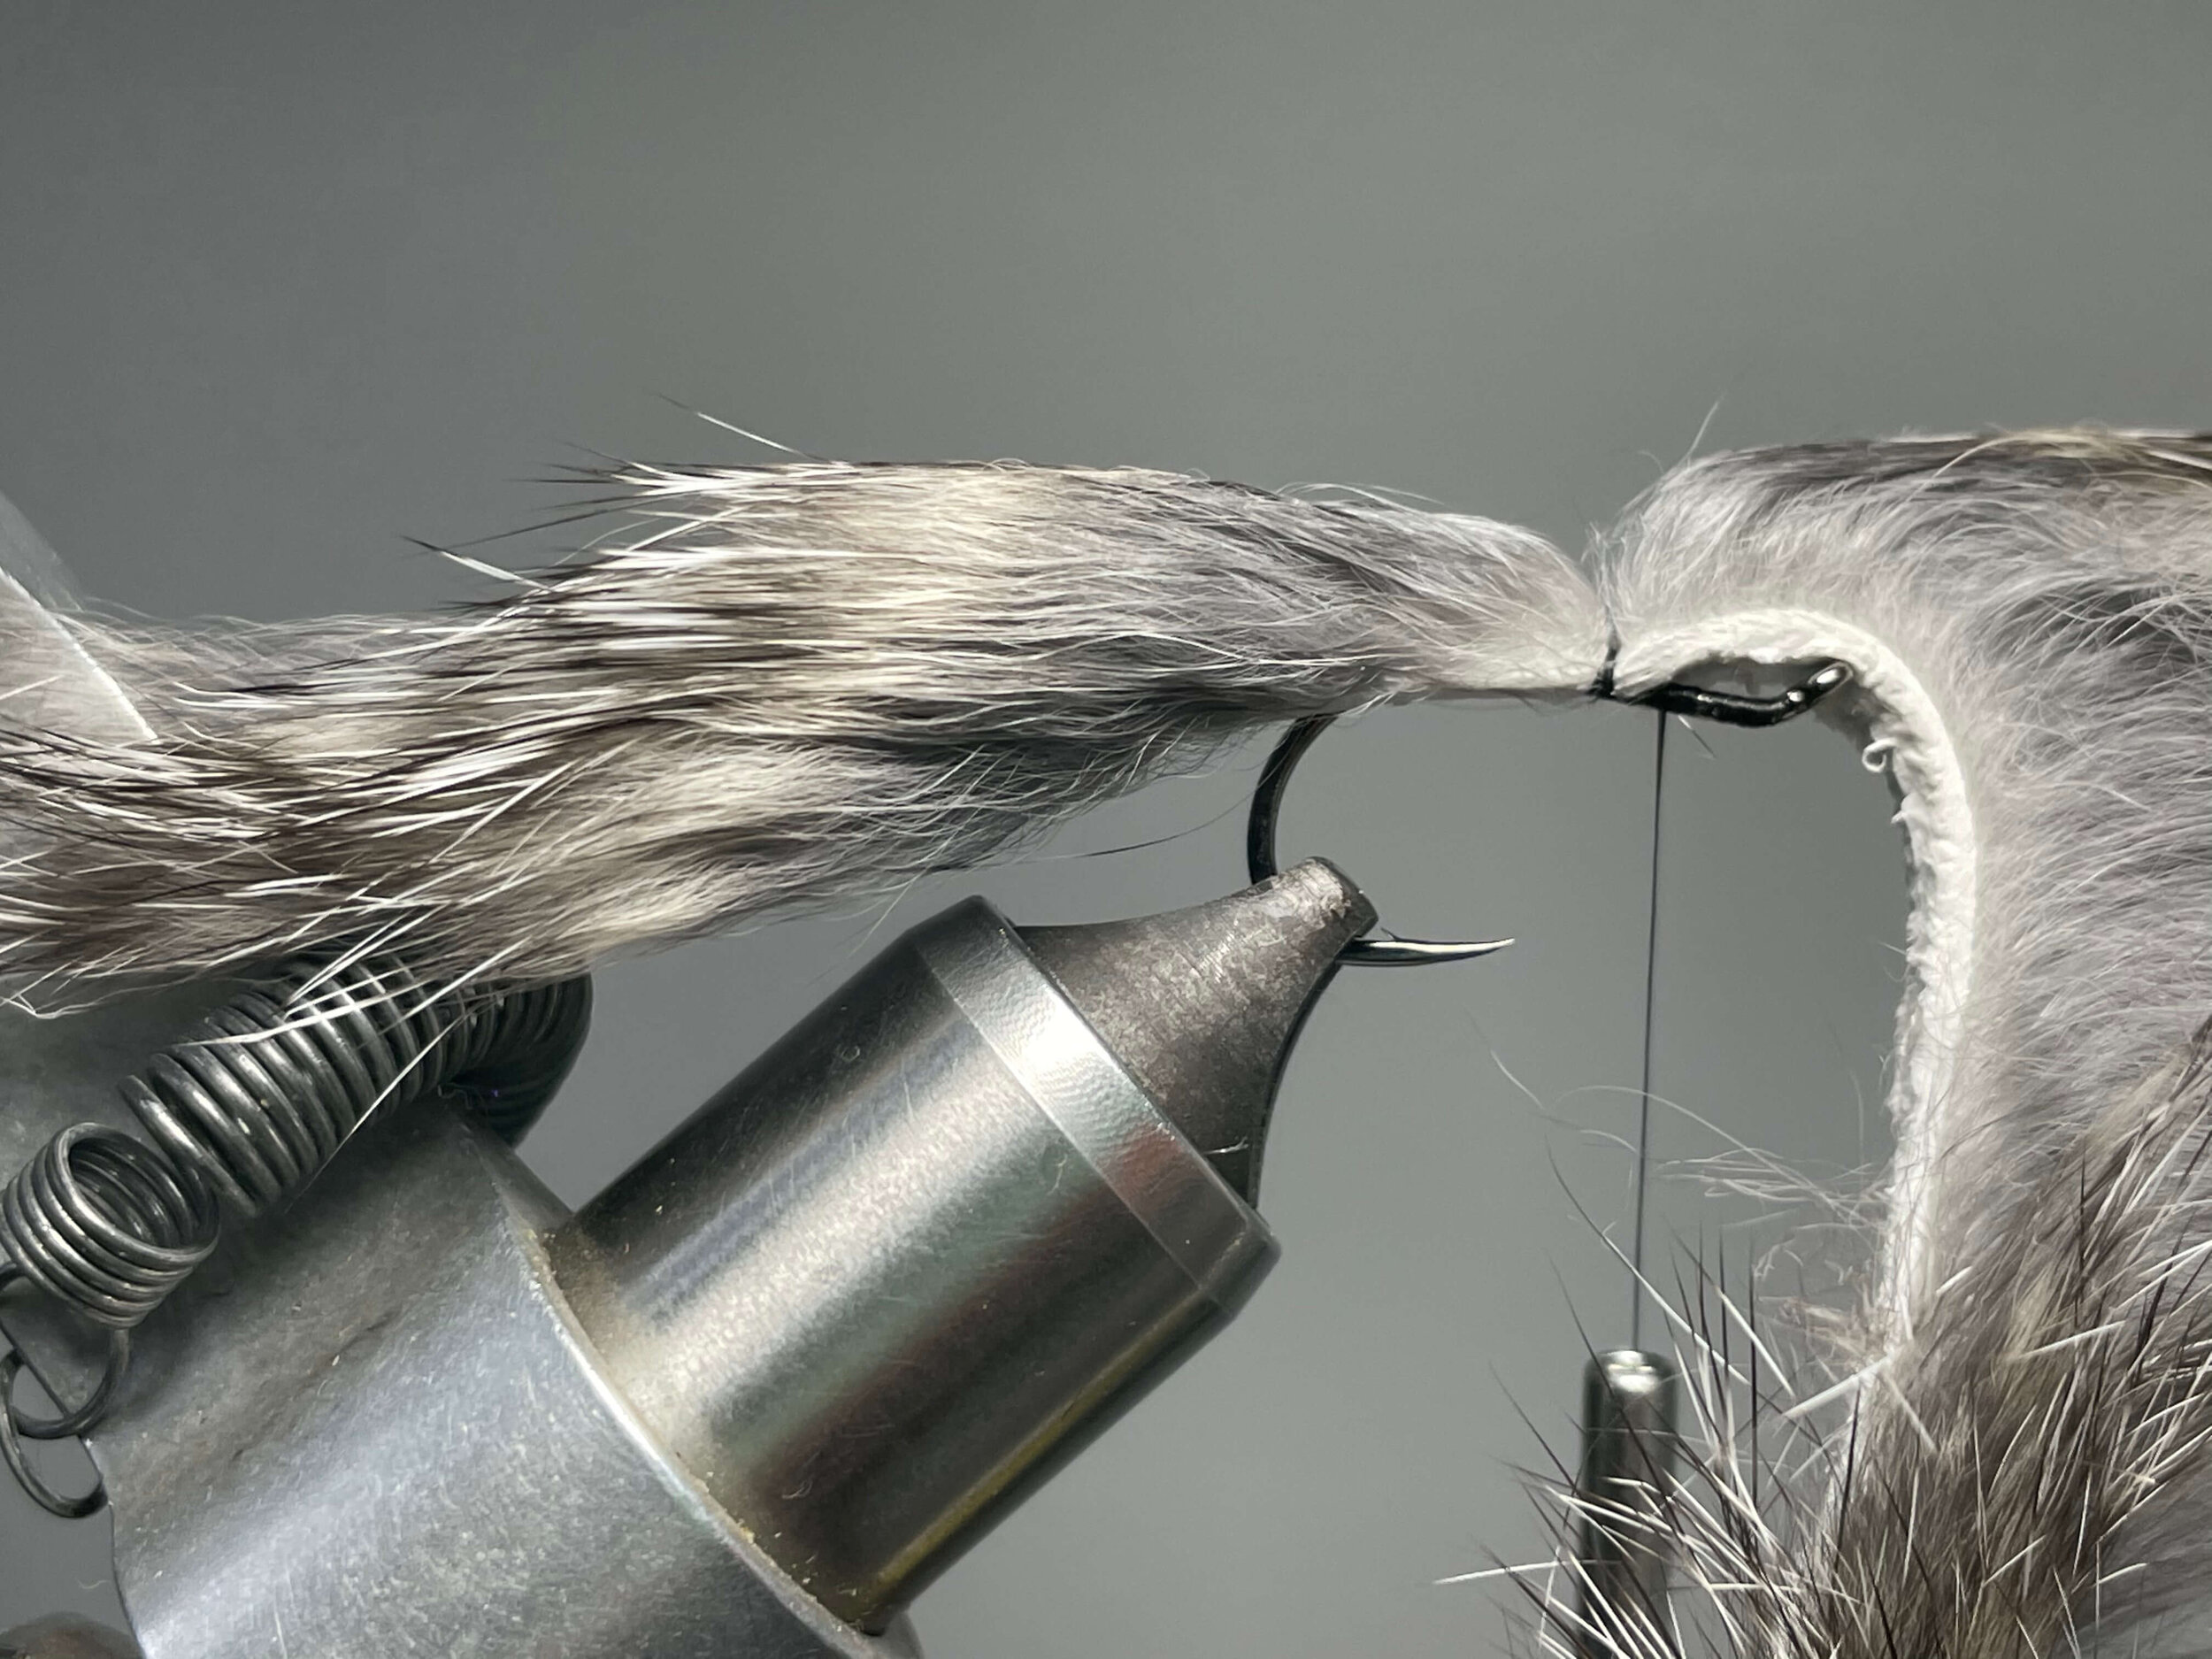
Run thread up and whip finish behind the hook eye. Leave the remaining rabbit strip hanging over the bend hook.

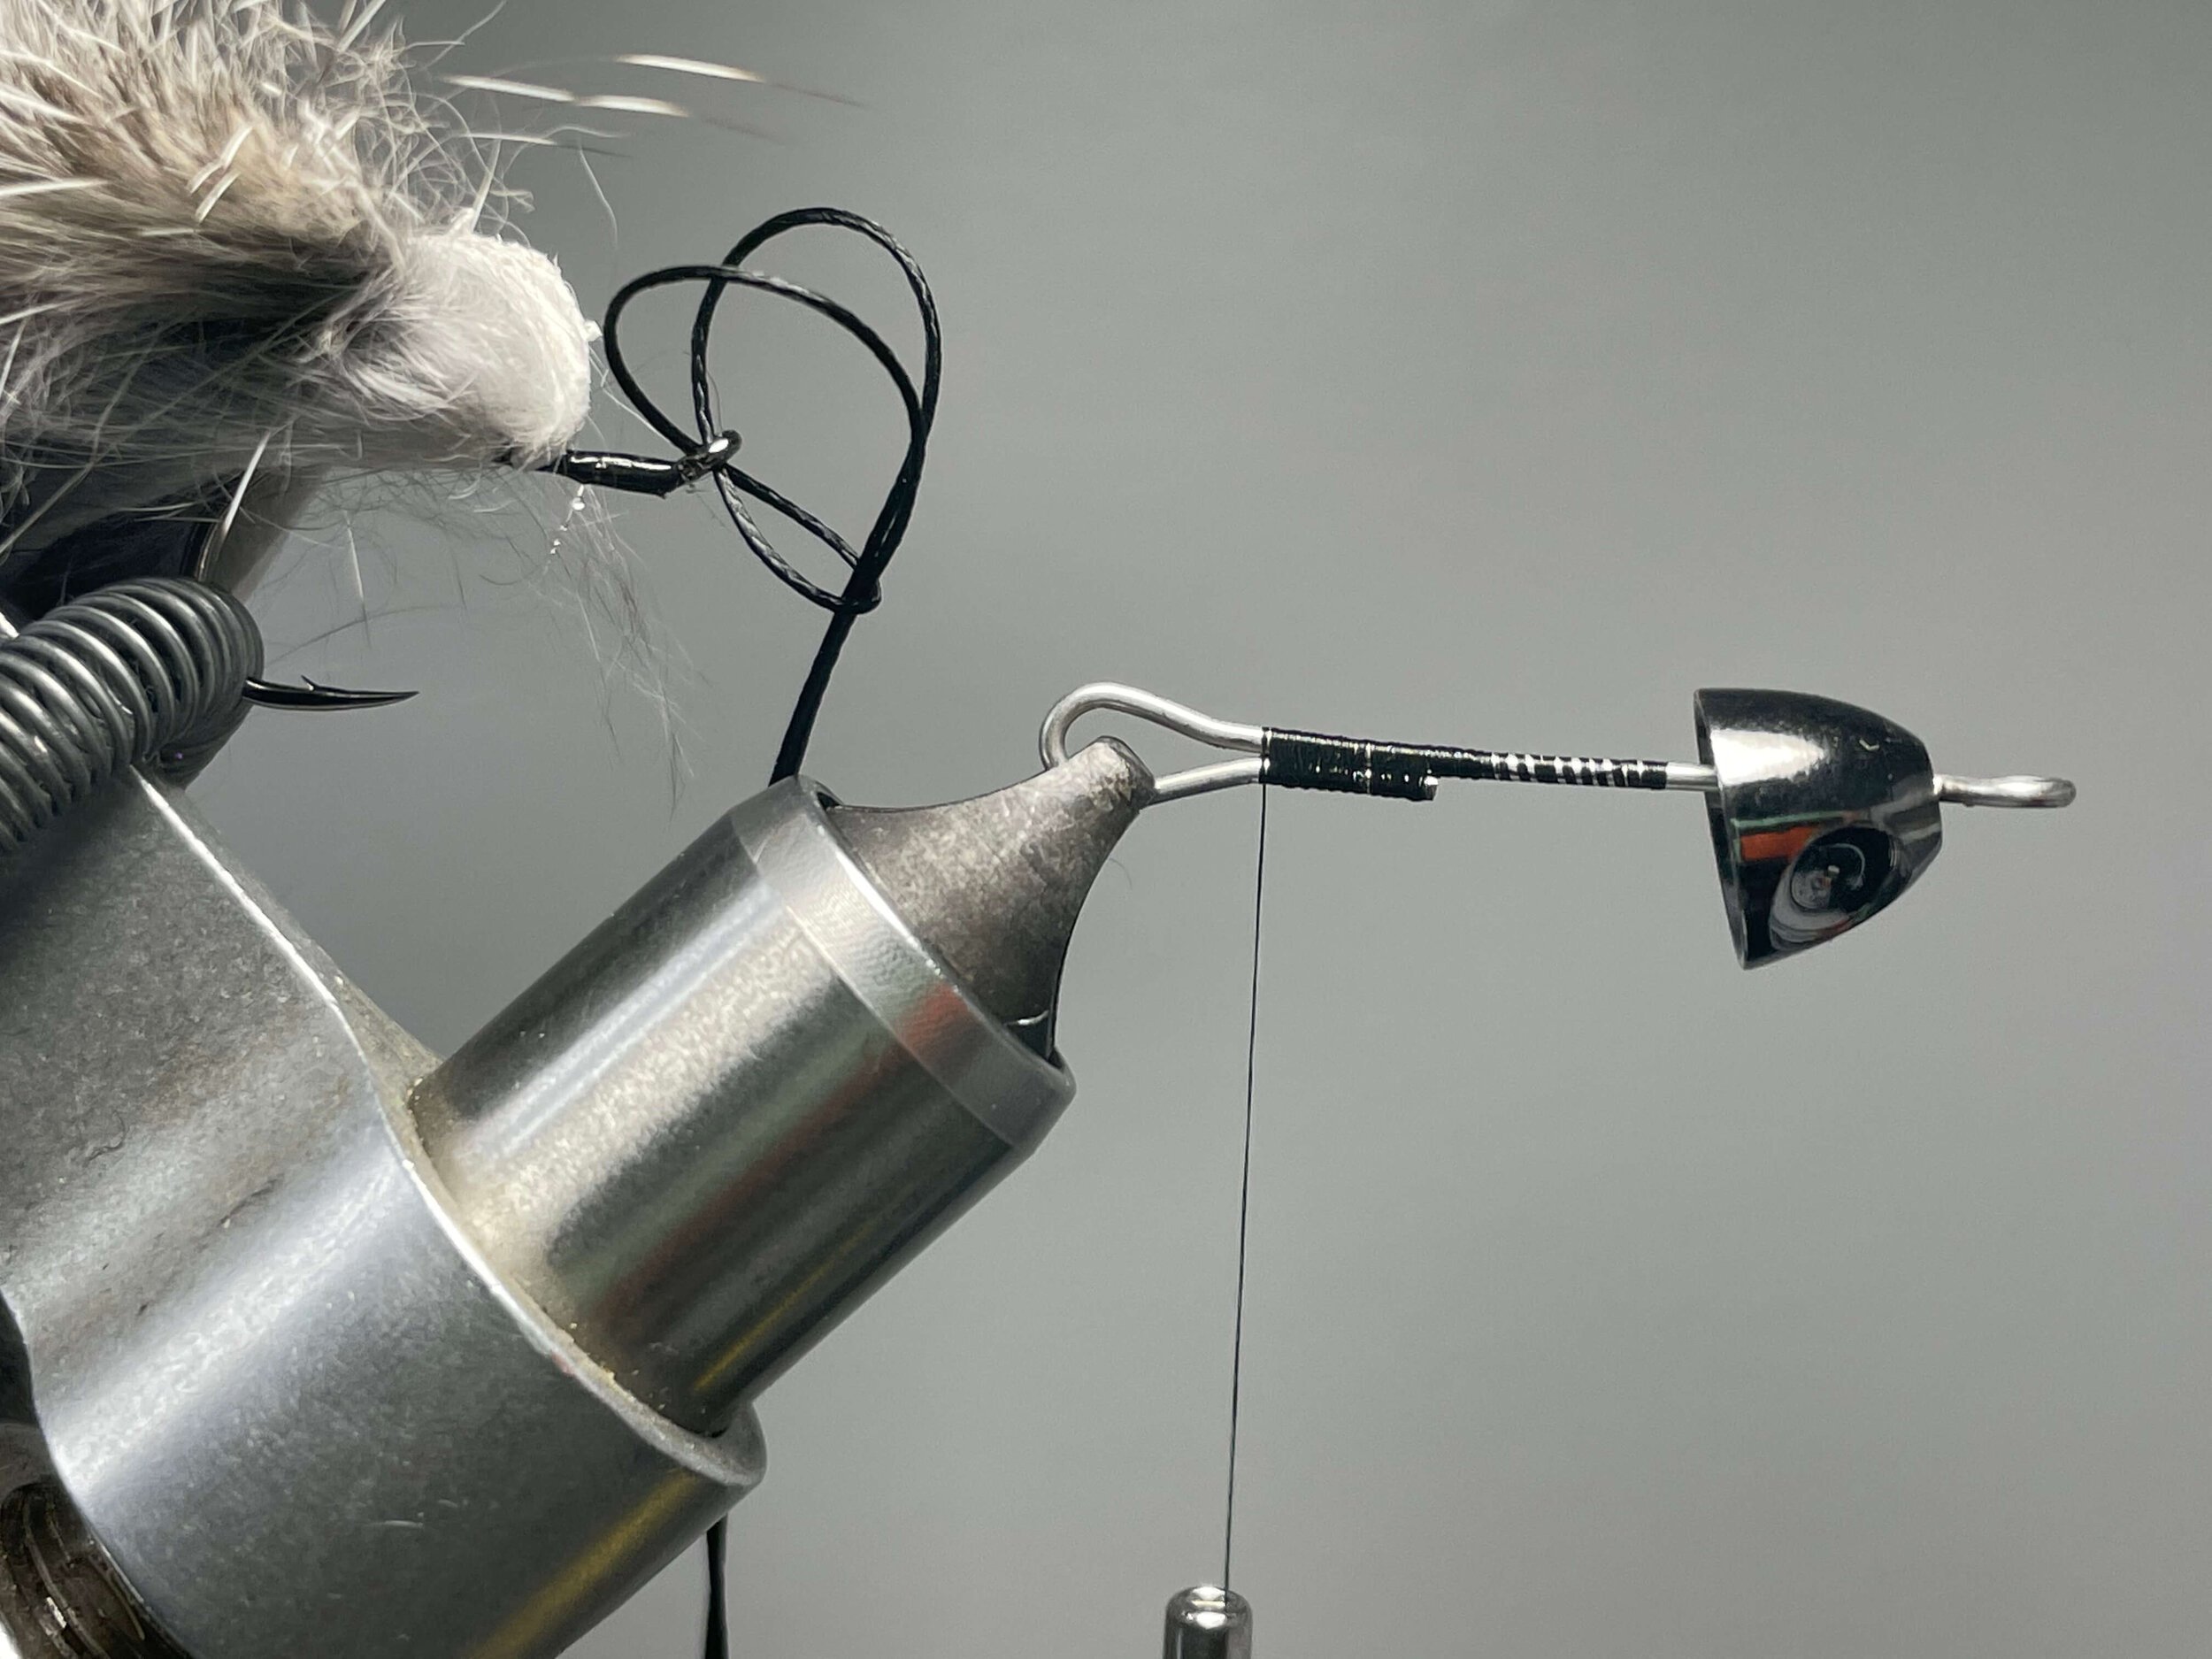
STEP 5
Run articulation material through the hook eye then set trailer fly in your materials clip. Insert articulated shank with cone head into vise.
STEP 6
Create a solid thread base most of the way down the shank.

STEP 7
Attach articulation material (wire) and wrap thread up to the hook eye making sure to keep the material on top of the shank.

STEP 8
Run wire through the cone head and down into the hook eye and secure it with tight thread wraps on the bottom of the hook shank. For extra strength needs, double back wire and repeat. Clip away excess. Apply super glue and allow to dry.
STEP 9
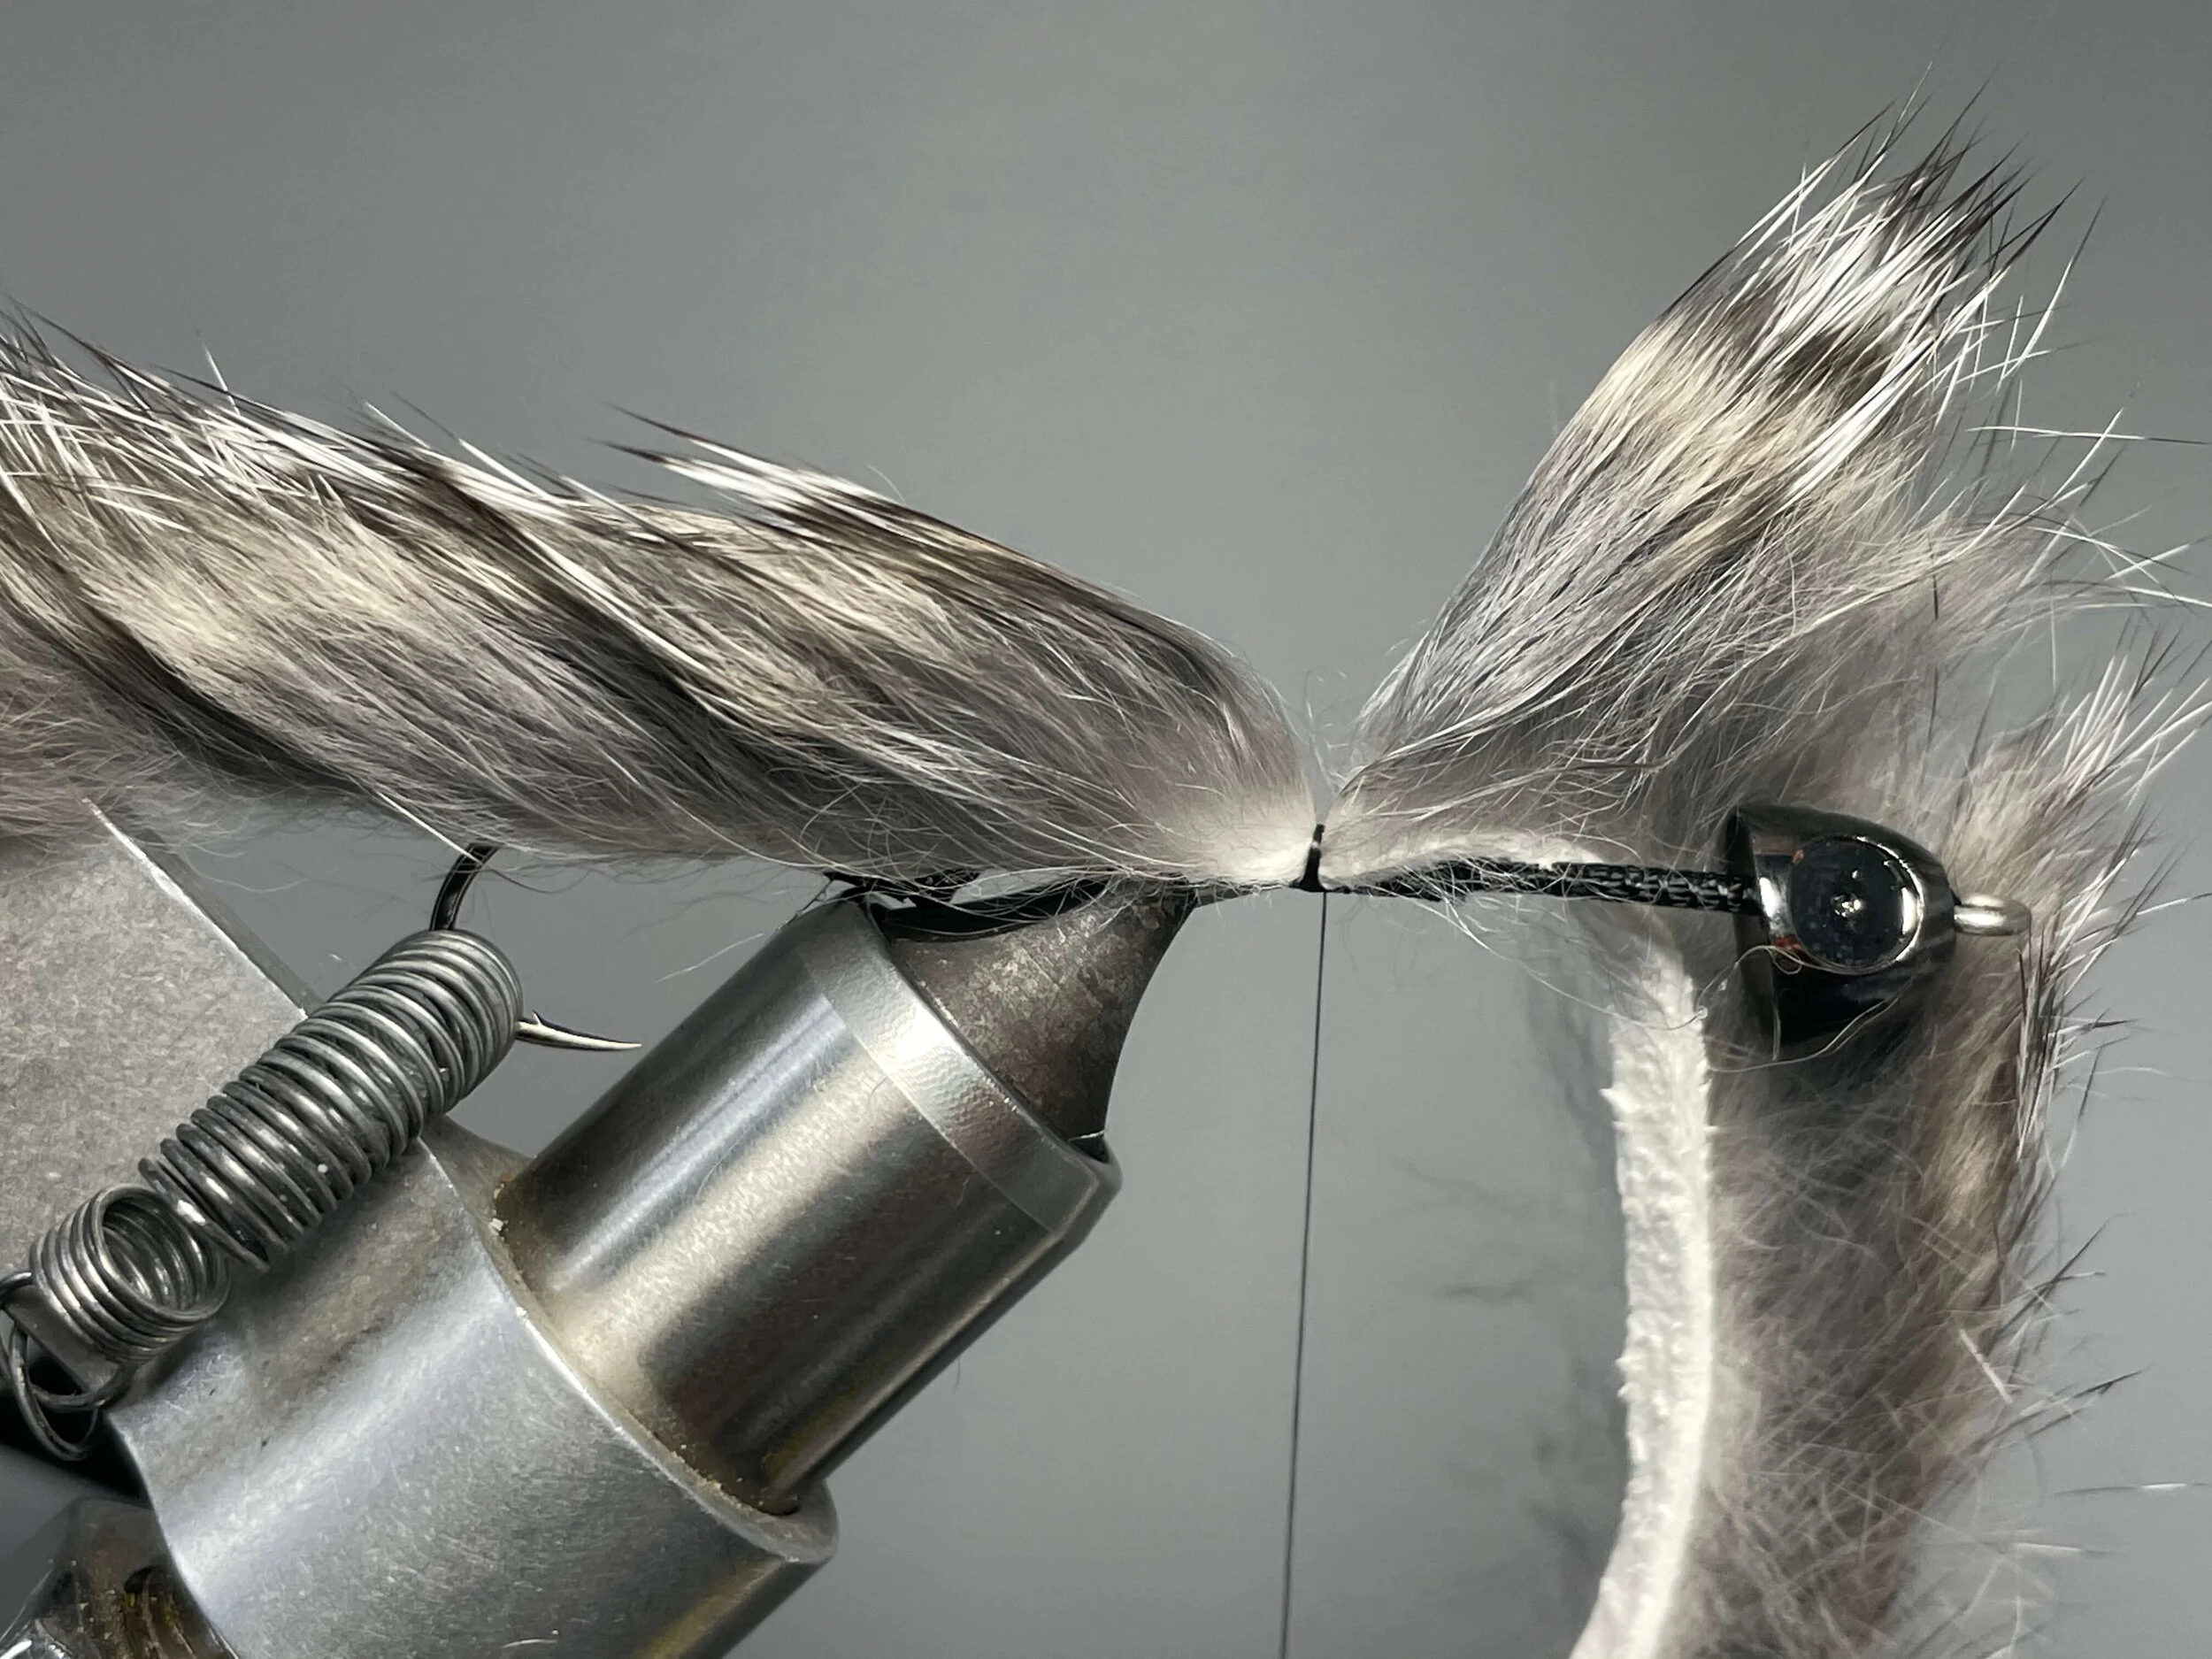
Bring rabbit strip forward and create a tie in point by wetting your fingers and preening the rabbit fibers forward to expose the bare leather strip. Secure the rabbit strip by the leather strip at the tie in point where your thread base begins.

STEP 10
Tie in polar chenille and wrap tightly forward to just behind the cone head. Position the polar chenille back as you wrap forward to prevent bunching up.

STEP 11
Bring the rabbit strip forward once again and tie off behind the cone head.

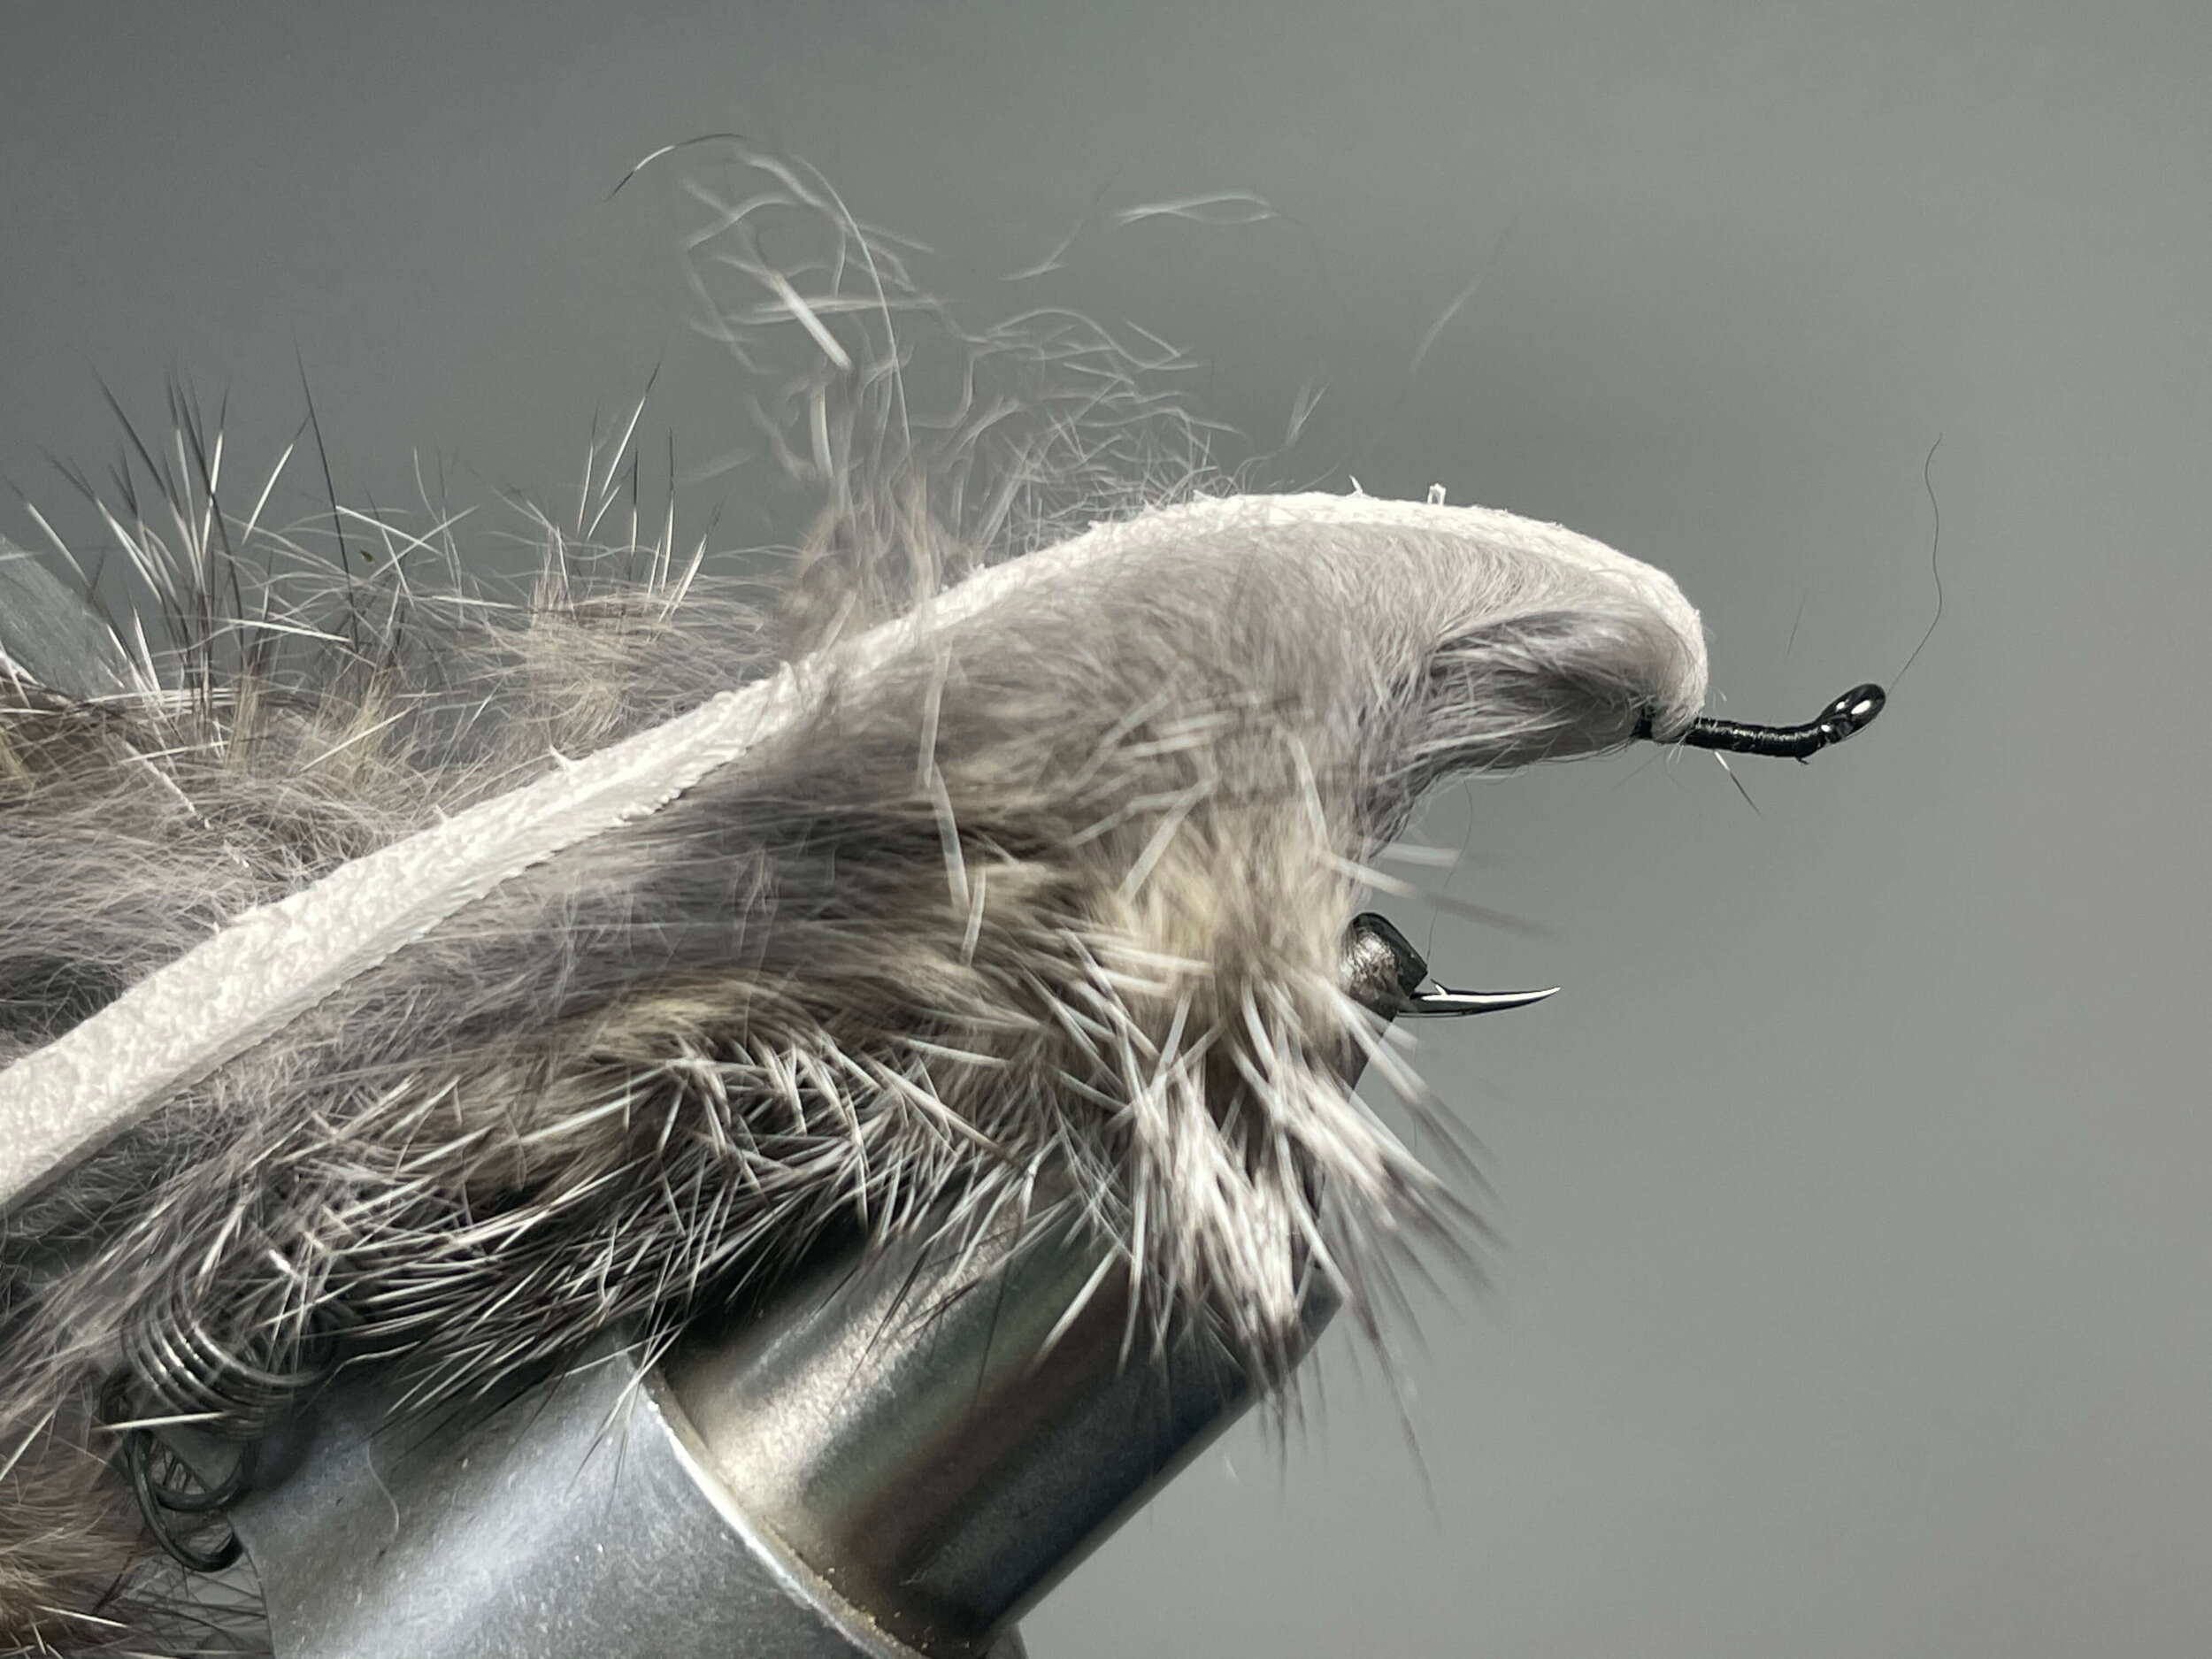
STEP 12
Wrap rabbit strip around hook shank once or twice behind cone head to create a broad collar. Trim excess off close.

STEP 13
Take tight thread wraps to clean up the head and further secure the rabbit strip. At this point make sure the cone head is firmly seated against the body of the fly.

STEP 14
Hold a guinea feather by the tip and pull off the fluffy bottom fibers.

STEP 15
Position the fibers down the stem to create a tie in point.

STEP 16
Secure the feather to the shank at the tie in point just behind the cone head.

STEP 17
Hold the guinea feather by the stem while wrapping around the hook shank. Secure with tight thread wraps and trim excess stem away.

STEP 18
Prepare a marabou feather by holding it at the tip and positioning fibers toward the thick end of feather to create a tie in point.

STEP 19
Tie in marabou feather.

STEP 20
Take a few wraps of marabou around the hook shank, secure with tight thread wraps, trim away excess then whip finish.

STEP 21
Press cone head up and apply a liberal amount of Locktite or preferred superglue into the space between your materials and the cone head. Firmly seat the cone head rearward against the body until the glue begins to set. Ensure that the eyes are flush with the side of the fly.